Friday, March 13, 2026

Ultrakill Blue and Red Skulls (Ferryman Keys)

    Hey guys, I just wanted to share another cool way to adapt ComplicatedKnots Skull pattern found here: Ravelry Skull Pattern In a previous post: The Five Children of Sithis and the Night Mother I showed how I adapted the skulls for another video game piece. I previously made the five skulls you see present in Oblivion and on the Dark Brotherhood sanctuary doors in the Elder Scrolls games. You can read more about it in the link provided above. 

    Today I want to focus on another cool way to adapt this pattern, and support a fellow artist while doing it. So please check her stuff out, she's also found on IG and youtube. The pattern is free for anyone interested. 

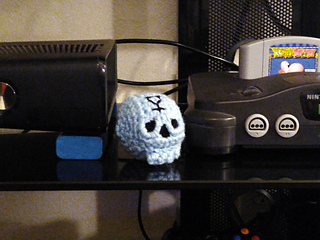
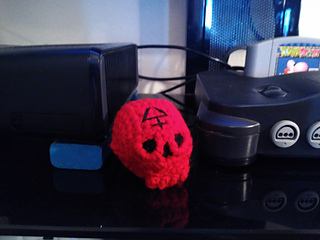
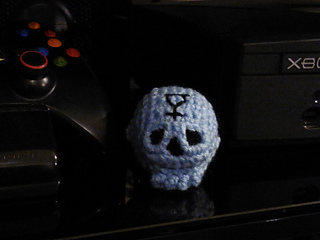
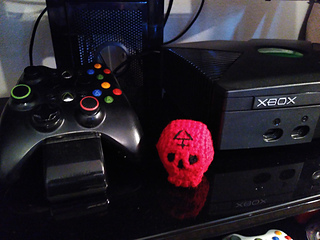
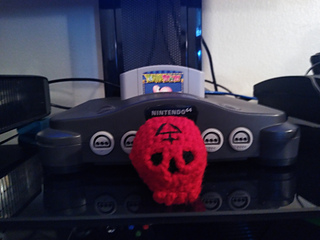
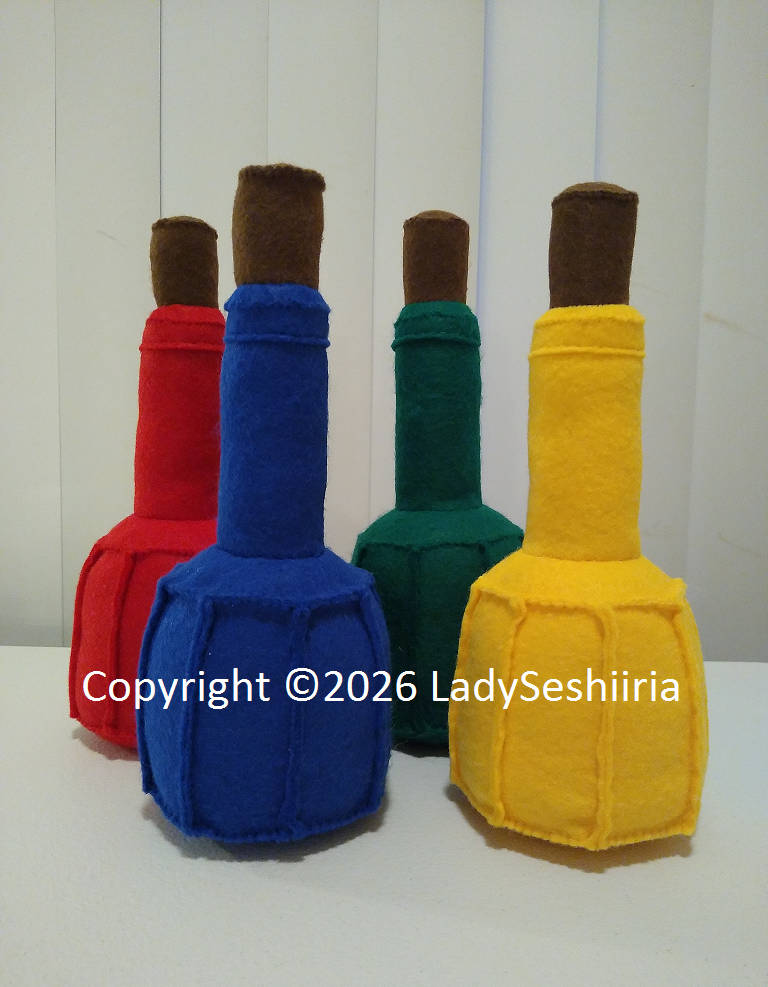
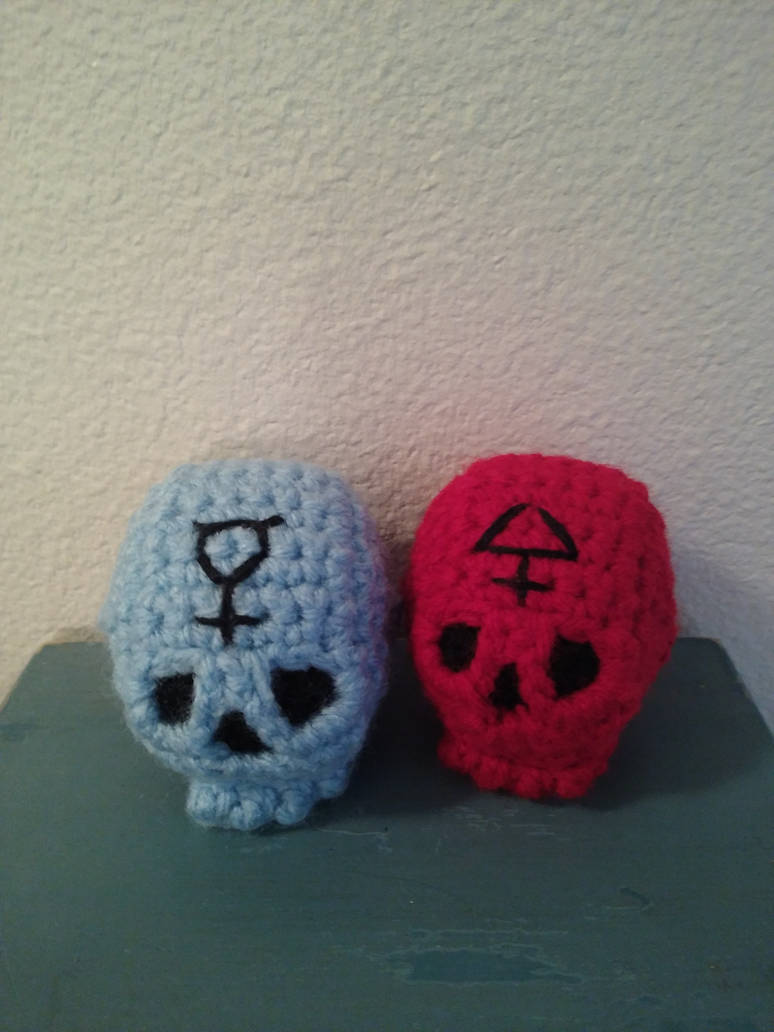
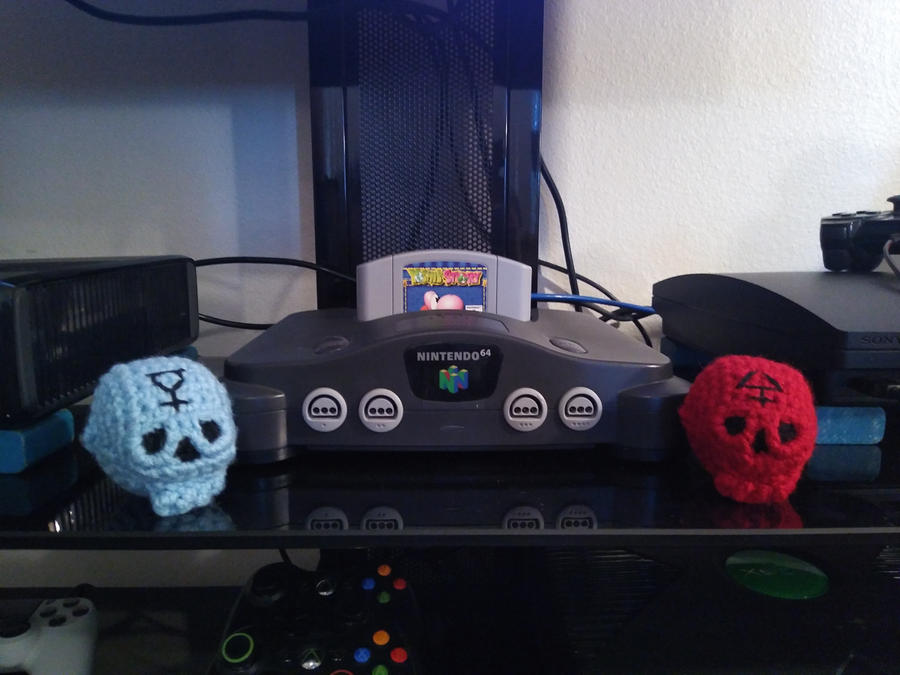
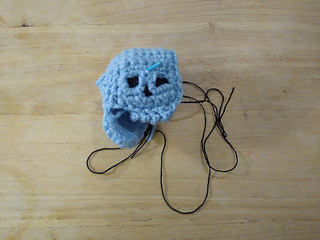
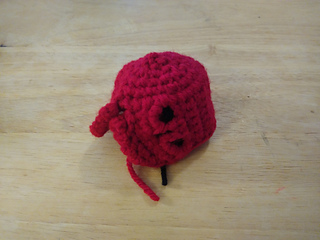
    So shortly after finishing my Dark Brotherhood gamer den decor, my son saw them and started playing with them. I asked him if he wanted one in his favorite color. But instead he brought up another game that I am not too familiar with but have seen him play. Ultrakill. So as far as I understand there are these two skulls, a blue and a red one he wanted. They open doors to other levels. The game itself is a parody of Dante's Inferno with a robot that kills demons and runs on demon blood. So if your kids play this game or if you yourself do and are interested in something cool for your desk or gamers den I present to you this adaptation below.

    Now I won't break the pattern down here for you guys, the link is provided above. However, I will provide my changes below which are minimal. To me I don't see harm in commentary or reviews on others patterns once in a while since it runs under a fair use clause. I decided I really do like this pattern and would definitely rate it a 5 stars! Here I am making it again for a total of 8 skulls in the house.

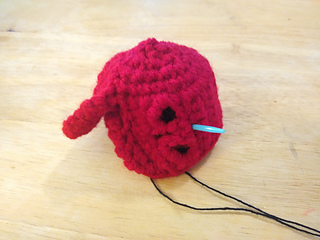
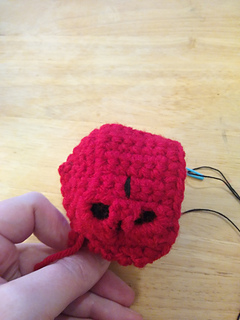
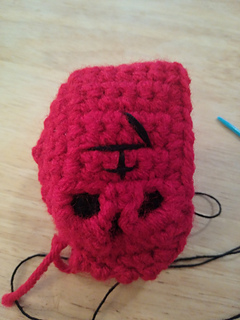
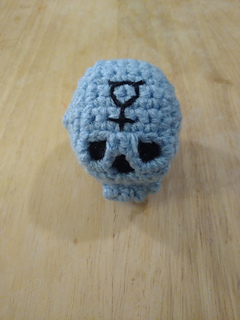
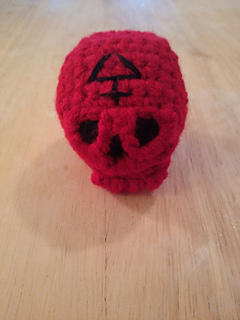
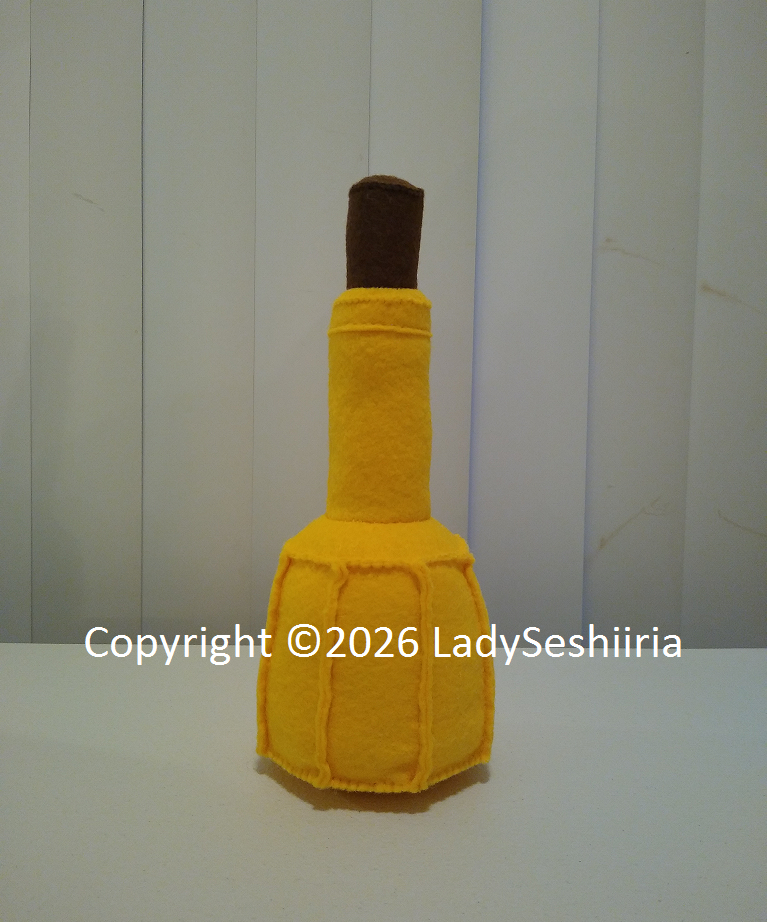
    Here's a couple examples of the finished skulls.


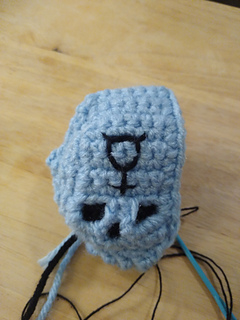
    And here's what I did to adapt the pattern for Ultrakill use.

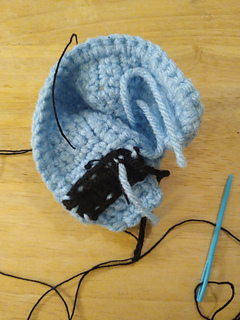
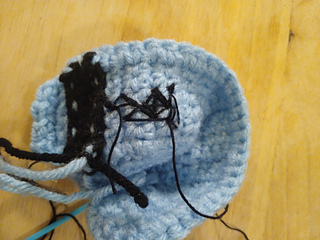
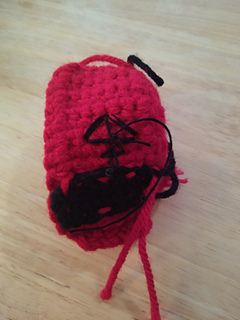
    After I finished closing the one side of either skull. I stopped crocheting so that I could embroider the runes into the skull correctly. I know some folks do this sort of thing after something is fully made and stuffed to prevent distorting but I didn't see it being an issue with something so simple. I can see it being a problem with facial features though. With these skulls I found that depending on your yarn it was best to not over stuff them anyways. You might want to consider that a factor when making yours.


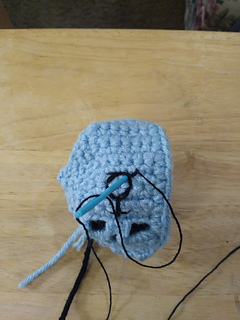
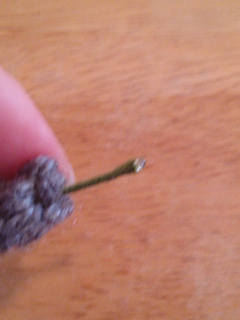
    So I know I could have used embroidery thread for something this small but felt it better and more durable to use Aunt Lydia's crochet thread size 10. (Not a paid or sponsored endorsement.) That's what I had on hand at the time and I think it worked out perfectly. I don't know that I would use a matching black worsted yarn on this for the runes. I think in my opinion, it would be too thick and potentially distort.

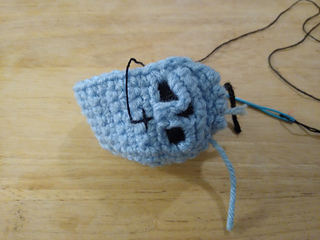
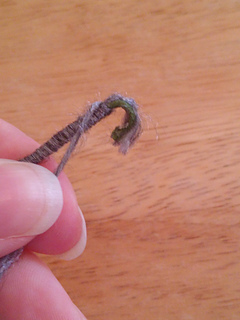
    First I triple knotted my thread and inserted the needle from the backside out to the front doing the cross first. I wanted to be more sure of placement on the front, the back wouldn't be seen. I was carefully strategic not always placing stitches in-between stitches but using the backside to sometimes push through strands of thread. 


    I did three rounds on each area, first the cross then created a diamond shape not a circle, and carefully placed stitches to push it into a circular shape. Next I placed the horned portion on the circle, pulling the last thread round underneath the top sections of the circle section so that I could round it out more. The goal was to create the alchemic symbol for Mercury.


(Using the horn positioning to pull the circle strategically into place.)

    Here's a couple images, one finished and one of the backside. You don't need to be perfect since that's going to be on the inside. I was more primarily interested with how the right side was going to appear. 


    Then obviously from here you would continue onto the next part of ComplicatedKnots youtube tutorial and finish up the skull. Continue down below for the red skull images and partial demo. 


    Once again I was careful and planned my placement, being sure to start with the cross portion first. Making sure to make several passes through each area to build that image up.


    When it came to embroidering the triangle portion I pushed it out a little bit further than the cross, since it appears that the official art shows that to be part of the design. 


    This one was easier to do and the backside looks cleaner too.


    And then from here, like with the last skull, I just continued on with ComplicatedKnots tutorial. Here are some finished images below. I'm not a professional photographer, but hey, it'll give you an idea on how to decorate your space.


Well there they are, kind of cool in my opinion on how these turned out! If you are a crocheter, I hope you can make a fellow Ultrakill fan happy or if you are a fan and a crocheter, I hope this will be double fun!

P.S. Happy Friday the 13th!

Tuesday, March 10, 2026

The Five Children of Sithis and the Night Mother

(A Nerdy Blog Post -- Adapting Another Artist's Pattern or Finding Inspiration For Personal Gamer Den Decor)

Sithis and the Night Mother had five children in which she slew in his name, returning them to the Void. Sithis demands souls to be returned unto him, he demands blood, and the Night Mother speaks for Sithis.

There are five positions of importance in the Dark Brotherhood: four fingers, and a thumb. Lesser known are the nails, or the personal silencers of the Black Hand. The thumb is the leader, the Listener of the Black, and and each of the four fingers is a Speaker called to distribute the Listeners instructions amongst the other assassins, including their personal silencers, for the best and most difficult contracts.

The Listener is symbolic of the first born child of Sithis and the Night Mother, and the Listener is the only one who can hear the Night Mother’s voice. 

Raveren: First born, honored the Dread Father.

Khev: Second born, betrayed the Dread Father by revealing secrets.

Nyrov: Third born, dishonored the Dread Father by disobeying his brother.

Aixel: Fourth born, betrayed the Dread Father by stealing his brother's crown.

Lis: Fifth born, betrayed the Dread Father by killing his eldest brother.

There are five tenets for the Dark Brotherhood and they all pertain to the above story. Some exist due to violations of trust, and one stands as an unholy righteous example. After all one should honor thy Mother and thy Father. :3 (Five is a sacred number in the Dark Brotherhood.)

Friday, March 6, 2026

Larp Potion Bottle Felt Plushie Sewing Pattern (Coming Soon...)


    Hello everyone. I hope you are doing well? My queue keeps getting bigger and bigger, and I am having to wrestle with several projects at once. A lot of what I am working on unfortunately keeps getting stalled out due to lack of supplies or resources. This one was no different. In an earlier post: My Candle Is Burning Out... I mentioned how my own labor became largely invisible to me over the years. This particular pattern has been a long hauler. I started it in December of 2025 and while the sewing and everything was finished in time for Christmas. I had issues with scanning my hand drafts and doing other stuff  like combing through it a dozen times to make sure my dyslexia is not present, and obviously to get this one prepped for launch. (More on it later.)

    Ultimately I came to the conclusion that this one needs to go up as a paid pattern. So I will be launching it on 03/17/2026 at 8:00 am MST on my Ko-fi for a limited 15 slot celebratory sale run at $10.00. Once it's sold out, it'll be relisted at full price, $12.00. https://ko-fi.com/ladyseshiiria

    Why am I handling it this way? Well, partially because I have never sold a pattern before, so I am not sure as to what to expect as a psycho small artist. I don't have much presence online even despite being online for decades. Most social media influencers have privilege or means to pay to play. So small creators, especially ones in poverty have to rely on luck to be seen. And it's a massively lottery. Lets be honest.

    So I guess wish me luck. I am stepping way out of my comfort zone and doing something super scary for me.

    I'm also trying to get a jump on Christmas for next year because I keep tell myself every year I won't make things last minute... and I end up doing it... So hopefully this time will be different? I guess we will see, because life happens... a lot here... A few of these things unfortunately are waiting on supplies.

    Anyway, speaking of Christmas, this particular pattern was developed shortly after my sweetroll was, and during a period where I was trying to rescue Christmas! (Christmas of 2025 is not the first one I've had to save...) It had been serious crunch time. I was exhausted at this point. Had drafted, tested my last pattern several times, and burned myself out trying to promote it on various social media platforms for the anniversary of Skyrim. I was sewing clothes, and making other goodies, trying hard to make Christmas work on a serious budget. (This is the reality of poverty and being a disabilities household.) I literally only spent like $5.00 on thread and a couple pieces of felt for Christmas because I already had a back stock of things on hand from prior years when I was working, things that were inherited, recycled, thrifted, or gifted like years ago. 

    My kiddo is autistic and he really likes plushies so that was the main goal of last year and why I drafted and tested so many patterns. I was trying to stay within his special interests and requests. At the point of Thanksgiving last year, I had like thirteen things in queue, not everything was my own original designs either. Some were free patterns I found online or patterns I purchased. (I'll share links to those sometime other posts because some other artists out there have made some pretty cool stuff. Support your fellow artists!!!) Those mostly got done and sewn for gifts. My own drafts and designs mostly fell behind. Well, I managed to get quite a bit done but there are things that didn't make it in time like I said. So I'm getting a jump on things for next year, and you guys might as well benefit from it too! A lot of what I post is free.

    At the time of writing this, I had been tightening up my written tutorial, working on a yellow version for visibility and better photos for my pdf tutorial. (This blog draft sat in fallow for like a month while I was working some stuff out, and I didn't get back to finish writing it until the day of posting this.) Cutting and sewing doesn't take very long with this pattern. I think it's reasonable to say, if you're not like me focused on writing and photography it probably only takes about an hour to an hour and a half to make altogether. It's a relatively short project. What's cool is you can make multiples of these in different colors, and color code them like video games. Red for health, blue for mana or magic, green for stamina or poison, yellow for strength, that sort of thing. Skies the limit on imagination. I also plan on eventually finishing my other bottle drafts and posting those too, but again supplies.

    What's nice, is if you have a better budget than I do, you can be a lot more picky about felt colors. I like this particular small business called Over The River Felt (I'm not sponsored or paid to endorse them. I just really really like their quality and selection and they are based in America.) I found that I especially like their heathered felt. They no longer provide this other stuff I liked which is a hand dyed tie dyed felt though, bummer. I just found out about that last month. I'm looking for a black and purple tie dye felt... As well and a gradient purple, blue, pink for another project (sewing pattern) that I started last year and had to back burner.

    I think what I'm really struggling with currently is no longer having access to Joann Fabrics. I really miss working there but there were a lot of unfortunate problems... That's putting it kindly. I live in a small town that doesn't have a lot of infrastructure or small businesses and it's rather difficult to find things. It's trying to catch up, but its being done very poorly... Instead of building houses, we should really focus on our roads... What's worse is Walmart shrank their selection on fabrics, tools, crafts, and notions, or doesn't stock them well. So I usually end up having to improvise with something I don't want to use color wise or fabric wise or change my plans altogether. (Like in my current secret project above that I back burnered... Sighs... I had to change my fabric approach and add seams. Might be able to make two versions though? One for felt and one for fabric. I guess we will see...) Or in other cases I end up having to wait a very long time to buy things online because I'm poor and have to rely on saving up for things and shipping... I don't mind snail mail though.

    Anyways, this particular pattern will be birthing another couple bottle patterns entirely. Since the testing went so well on this one. I'm hoping to get some higher quality felt from my favorite shop and do my next variations in better color choices. 

    Trying to unlock some things...


    I'm also making a ton of stuff trying to kick off a way larger project but I don't want to jinx myself and just mostly quietly manifest it into existence. I'm hoping all this energy brings it about into being.

    Well here is another photo of this particular pattern. The pattern and instructions will be available for sale soon as a digital download on my ko-fi. Thank you for reading. I hope you have a great week! 


Sunday, March 1, 2026

Skyrim Inspired Lockpick Crochet Patterns Version 1 and 2

(Version 1)

(Version 2)

Difficulty:  Easy & Beginner

Description:

Fanart inspired by Elder Scrolls Skyrim. Version 1 can be made rather quickly and used as a Christmas ornament, accessory for a backpack or purse. Version 1 can be starched to suit your needs.

The studier version can be used as a cosplay prop and uses floral wire in its construction. It’s easily adaptable to whatever size you may want to make, just change yarn, thread, or hook size. For version 2, you may wish to scale up for larger sizes. To do so measure in inches not stitch count or rows. For example adding 1 inch to the wire length and the I-cord length.

Below are two separate patterns or two different versions. Some may choose to make a more sturdy version for prop accessories just be wary that floral wire bends easily, and the hook portion may snag on things. It’s mostly meant as a prop. If you choose and you have the tools to bend stronger wire, you can opt for a higher gauge and stronger metal, just scale up your I-cord as necessary. 

The second version requires a bit more knowledge of crochet, using the I-cord method, as well as a bit of assembly.

Version 1 measures about 4 1/2” while version 2 measures 5 3/4” finished.

Copyright:

Copyright 2026 LadySeshiiria for pattern, photos, and instructions.

You may use this free pattern for personal use only. Mass production is prohibited. You may not copy, edit, sell, reproduce, or redistribute this pattern, its photos, or instructions. AI and NFT are strictly forbidden and prohibited. Selling your finished creations and sharing is welcome though, as long as it credits the original artist and links back to source. Thank you for respecting your fellow artists and crafters.

Disclaimer:

Unofficial Fan art inspired by Elder Scrolls V: Skyrim / Bethesda Softworks.
All characters and related properties belong to their respective owners. Not affiliated with or endorsed by the original creators.

Abbreviations:

Ch = Chain
St or sts = stitch or stitches 
Sl st = slip stitch 
Hdc = Half double crochet
I-cord = a special technique that makes a braided rope. 
F.O. = Finish off

Supplies: Version 1

- Aunt Lydia’s Crochet Fashion 3 Thread Grey or Stone
- 3.5mm Hook
- Scissors 
- Yarn Needle

Supplies: Version 2

- Red Heart Yarn - Worsted Weight in Heather Grey
- 4.5mm Hook
- Scissors 
- Yarn Needle
- Floral Wire 
- Wire Cutters 
- Hot Glue Gun 
- Hot Glue

Instructions:

Version 1: Easy


Ch14, hdc into the second chain stitch from the hook, then hdc into every chain stitch after that. Do not chain or turn, instead slip stitch into foundation chain of same stitch on other side, this will place you into the center of the side of the last hdc stitch. Chain 12, and then sl st into 3rd stitch from chain creating picot stitch. Fasten off. Weave ends in. Starch for stiffness.


(Where to place sl st at the end the base hdc.)


Version 2: Beginner

Note: If you don't know how to do I-cord, there are tons of tutorials online, both picture and video.

Ch3, create 12 I-cord rows or about 3”. Then yo, sl st through all three sts on the hook, ch1 and pull yarn all the way through the loop leaving a decent amount of length then cut, do not F.O. We will use the excess length for the lockpick assembly.


Cut 6” of floral wire. 

The next section will take some care, so do not rush it. The last thing you want to do is snag your yarn fibers on the freshly cut floral wire. I suggest using a yarn needle to help you through this next section. I used the yarn needle to gently ply the in between posts on the back of the I-cord work as I passed the floral wire through. Down below you will see example photos below of the I-cord post section.


Start by fishing the floral wire through the top of the lockpick’s I-cord.


Back of the I-cord work, the yarn needle shows what posts I am talking about. Lift gently and work slowly.


Once the wire is fully fished through the I-cord, sew the bottom closed with the remaining tail and clip excess. 


Pass the top tail through the I-cord, closing the stitching and then hot glue the excess tail the length of the remaining floral wire. We want to do this now, securing it before bending the wire to prevent the yarn from snapping under unnecessary tension later while shaping.


Cut excess yarn tail.


Bend the tip into shape.


Cut a new length of yarn at least 5 times the length of the portion we are about to wrap. Split the yarn into single threads.


Put a dab of hot glue at the base of the wire next to the I-cord and press the split yarn strand to it and start wrapping slowly. You do not want to pull so tight that you break the thread.


Once you get the end of the hook, dab a bit of hot glue on the tip and slow down even more so and watch how you wrap. You don’t want to snag the thread on the end but want to cover the rest of it. This needs to be done this way, because if you wrap then bend the hook you might snap the thread due to tension and have to redo it.


Push up the I-cord on the bottom end of the lockpick, dab a bit of hot glue and push it back down into place to secure it. (Sorry about the blurry photo, it does the job.)

And now you have finished making you lockpick prop! I hope you had fun making these!